Sunday Kitchen – Speculoos Cupcake Recipe

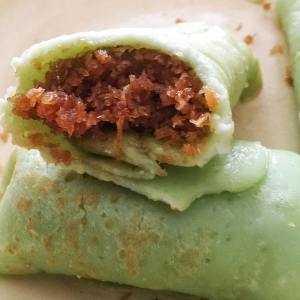
I am a big fan of speculoos/lotus cookies! It usually comes with my black coffee and I would shamelessly beg for more. Hence, it doesn’t take much for me to figure out what I wanted to bake this weekend, and it was an absolute hit amongst the friends 🙂

I used an incredibly simple vanilla cupcake base which turned out the best, lightest and fluffiest I’ve ever made. Topped off with delicious speculoos buttercream! Think some of the friends had 3 cupcakes in a day.

Kudos to lovely joyce for invading her awesome kitchen and big shoutout to my talented andrew for shooting, editing, colouring and mixing the sound! Check out his latest travel video to estonia/poland/lituanian here.

Ingredients required

Vanilla Cupcakes

  1. 175g Self Raising Flour – sifted
  2. 175g Soft, unsalted butter
  3. 150g Caster Sugar
  4. 3 large free range eggs
  5. 2 tsp vanilla
  6. 2 tbsp whole milk

Speculoos Buttercream

  1. 150g Soft, unsalted butter
  2. 300g Icing sugar – sifted
  3. 200g Speculoos Spread or Biscoff Cookie Butter
  4. 40ml whole milk

Decoration/Fillings

  1. 12-14 Speculoos/lotus cookie biscuits for decorating
  2. 3 tbsp of Nutella/peanut butter and 3 tbsp of milk – for filling if you like

Equipment required

  1. Digital Weighing Scale
  2. Stand Mixer
  3. Muffin Tin
  4. Loads of bowls for your ingredients
  5. Spatula
  6. Piping bag and a 2D piping tip

Steps

A. To make the vanilla cupcake base (yields 12-14 cupcakes)

  1. Heat your oven to 180C/160 Fan/350F and line a cupcake/muffin tin with 12-14 cases
  2. Beat on medium speed – soft, unsalted butter with the caster sugar until pale and fluffy (about 3x more in volume)
  3. Add your eggs with the butter/sugar mixture one at a time. Mixing well before adding the next
  4. Add your self-raising flour and vanilla with the butter/sugar/egg mixture until well combined. Make sure you start mixing at low first and adjust to medium so you don’t get flour everywhere!
  5. Don’t forget to scrape the sides of your mixing bowl down and combine everything well
  6. If the mixture is too stiff you can add a little bit of milk at a time to get a smooth light consistency.
  7. Using an ice-cream scoop (to make it the same amount per cupcake) dollop into the cupcake cases – Bake in the oven for 15 minutes or until a skewer poked into one of the cakes comes out clean and they are springy to touch – Leave to cool.

B. For your gorgeous Speculoos Buttercream

  1. Beat the butter with an electric mixer for a couple of minutes to smoothen it
  2. Gradually add the icing sugar on the slowest speed. Keep on low until the butter and sugar are incorporated and then kick your mixer up to medium high. Mix for 3-4 minutes until thoroughly combined and smooth
  3. Add the Cookie Butter to the buttercream and continue mixing. Once fully incorporated, after a minute or so, stop the mixer and check the consistency and taste.  At this point your frosting may be a little dry. Add a little bit of milk, mix and check again. Gradually add the milk until you reach the desired texture. I usually don’t add all at a shot as it might get too runny and wouldn’t hold its shape.
  4. Keep on beating on high for 5 minutes until whipped!

C. Time to decorate!

  1. If you like fillings in your cupcake – cut out holes in the center of your cupcakes using an apple corer or small knife. Incorporate nutella/peanut butter with milk well and pipe it into the center of your cupcakes
  2. I use a 2D Drop Flower tip and piped the buttercream onto the cupcakes.
  3. You can choose to crush your speculoos cookies and sprinkle them on to the cupcakes or use a whole speculoos/lotus biscuit and place it on the buttercream!


Go forth and bake my fellow earthlings! Till next time 🙂

Sunday Kitchen – Ondeh Ondeh Recipe

 Ingredients required

  1. Sweet Potato Mash (See #A1) – 64 grams
  2. Glutinous Rice Flour – 90 grams
  3. Coconut Milk – 90 grams
  4. Gula Melaka – 60 grams (or as much as you require to wrap in glutinous rice balls – See #C1)
  5. Desiccated Coconut – 50g (the more the merrier for coating really)
  6. Pandan Paste or Pandan Juice (Boiled down – see #B3)
  7. A Pinch of Salt

Note: Proportion of ingredients 1, 2 and 3 is always 64:90:90. If you want to make more, just adjust accordingly. This recipe makes about 14 Ondeh Ondeh.

Equipment required

  1. Digital Weighing Scale
  2. Steamer (for Desiccated Coconut)
  3. A Pot of Boiling Water (for cooking)
  4. Large Mixing Bowl

Steps

A. Prepare Sweet Potato Mash, Desiccated Coconut and Gula Melaka

  1. Steam the sweet potato, mash it up and push it through a strainer – this is to remove any bits and pieces of sweet potato and fibre threads. Set aside to cool till you are able to handle it.
  2. Get your desiccated coconut on to a plate with a pinch of salt. Set it in the steamer or however you usually steam for 20 minutes while you prepare the B. Dough.
  3. Chop Gula Melaka into small chunks – about the size of peas, set aside.

B. Dough

  1. In a large mixing bowl, mix the glutinous rice flour with your coconut milk and knead slowly into a dough. If your dough is not coming together, slowly add more coconut milk and knead till you achieve your dough.
  2. Add sweet potato mash prepared in #A1 into the dough mixture in #B1 and knead it together to combine.
  3. Here’s when you add pandan paste till desired colour and combine it well. I would suggest starting with 1/2 teaspoon and slowly adding to desirable colour. Otherwise, blend about 10 pandan leaves and boil it down with 200ml of water, strain it through a cheesecloth to get pandan juice.

C. Wrap and cook! 

  1. Pinch a small piece of dough (about 13g each) and flatten slightly. Fill the center of the dough with Gula Melaka and roll them into a smooth ball.
  2. Bring a pot of water to boil and cook your glutinous rice balls in the boiling water. When the rice balls floats to the surface, remove it with a slotted spoon and place these little babies into your desiccated coconut prepared in #A2.
  3. Roll it around to coat it generously with desiccated coconut and SERVE!

There are different variations of recipes for Ondeh Ondeh online, if you’ve tried others or have any suggestions to make this even better, do share! 🙂

14409410_10153991326954779_4936032848778584590_o 14324405_10153991320369779_4005296063287197206_o

I also used the remaining Desiccated Coconut and Gula Melaka to make Kueh Dar Dar. Perfect for tea time with your ondeh ondeh and really, I hate having leftover ingredients that I will ultimately forget about which is a waste. Enjoyed this with some Sri Lankan tea thanks to Andrew Chua‘s Sri Lankan Trip earlier this year.

You wanted an A but you got a B

“Let’s be honest. You got an A- but you’re still mad (…) You will almost certainly face more and deeper adversity.”

Sheryl Sandberg, COO of Facebook shared at a commencement speech at University of California, Berkeley.

She lost her husband a year and 16 days ago, and through the junks and possibly the lowest point in her life, she learnt that when life sucks you under, you can kick against the bottom, break the surface, and breathe again.

I lost my dad on 3rd January 2016. I woke up in the middle of the night during my staycation to a phone call. It was the only night in these many years I decided to switch the ringer to full volume and it rang, as though I was expecting it.

And I’ve since learnt a lot about myself, my personality, how I face challenges, how I’ve change the way I approach challenges so that I will be stronger for more that will come my way.

Sheryl Sandberg put it in a very simple but powerful sentence:

“The easy days ahead of you will be easy. It is the hard days—the times that challenge you to your very core—that will determine who you are. You will be defined not just by what you achieve, but by how you survive.”

Every time sadness comes rushing in and trips me at the most unexpected moment during the day/night, I tell myself “If I get through this, I will only be stronger!”. I am only able to tell myself this because I accepted that I am not an emotionally strong person. Only when you accept your flaws (P.S. I’m anal about how people use the word “emotional” loosely with a negative connotation.) that you will be able to put some actions into improving and changing.

The reason why I am sharing this story for the first time online is because I want to encourage people to not be afraid of failures and losses. There will certainly be many more of such situations to come in life, always remember that you will survive and you will survive even bigger challenges ahead! If you can recognise that you are falling into the downward spiral of despair, you can catch yourself.

Gratitude and appreciation is key to resilience. Be grateful for how things can be worse but it isn’t. Appreciate the people around you but more importantly, appreciate yourself.

Read and watch more of what Sheryl shared, especially on the 3 Ps – http://www.techinsider.io/sheryl-sandberg-berkeley-commencement-speech-2016-5


Buttery & Sweet Fluffy Pancake Recipe

I literally just made some incredibly fluffy pancakes with a rich buttery taste and a slight hint of sweetness from some leftover ingredients. I had some leftover whip cream, eggs and butter which would have been a waste if I left it in the fridge and soon forget about it.

IMG_5387

Perfect for breakfast, afternoon tea or supper. Pancakes are just perfect for any occasion! Easy, cheap and you can store it in your fridge – just microwave it the next time you’re ready for some. It taste so good that you can eat it plain!

Ingredients

Eggs
2
Granulated sugar
3 tablespoons (depending on your preference)
Salt
a pinch
Milk
80 ml
Heavy cream
50 ml
Unsalted butter
30 g
Cake flour
200 g
Baking powder
2 teaspoons

IMG_5386

Preparation

1. Melt your butter in the microwave or over a double boiler. Meanwhile, sift the flour and baking powder together, set aside.

2. Crack the eggs into a bowl, add the sugar & salt. Now put some muscles in – beat it with a whisk till its pale/off white to ensure smooth, lump-free batter (if you bake butter cakes often, it should look like the colour of your well beaten butter & sugar).

3. Add the milk slowly while mixing. Followed by the heavy cream and mix well.

4. Add the sifted ingredients and melted butter in (1). Mix well until smooth and thickened.

Your pancake batter is ready! Try this for yourself and you will never, ever buy pancake mix in a box that is tasteless and twice the price.

5. Heat a non-stick pan over low heat. Make sure your pan is heated evenly to give you a beautiful brown finish later. When ready, add a small ladler of the batter from (4). I made mine in 5cm diameters with a bit more height for fluffy pancakes. But make sure you cook on low and constantly adjust the heat so that it is cooked through but not burnt. Otherwise, play safe and make 10cm diameters.

6. When bubbles pop on the surface, flip them over. Cook the other side, then transfer to a plate. Repeat the process with all the batter. Makes about 10 pancakes 🙂

Technically you don’t need oil for a non-stick pan but I like my pancakes with extra oomph so I use a tiny bit of butter.

You can serve it with honey or whipped cream. I will probably have mine with the raspberry jam I bought from Perth!

With love, Joan


6 Days in Western Australia

IMG_5254
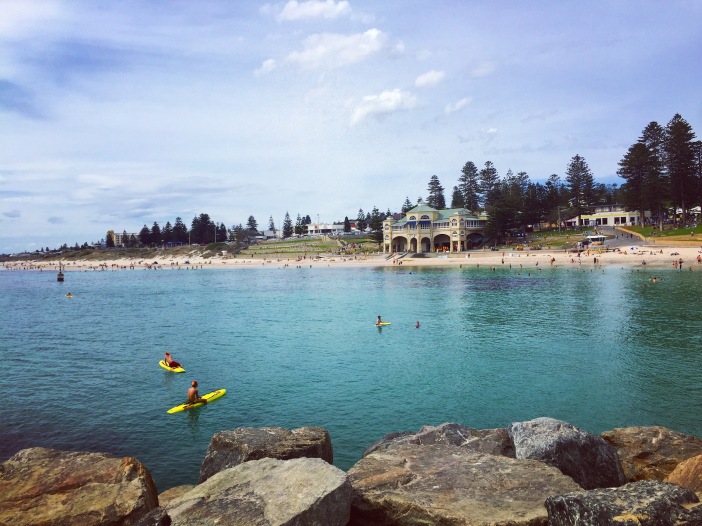
I’ve spent some time working in Sydney a few years back and there are just countless things about the lifestyle in Australia that makes it a great place to live in. Since Andrew’s leave was only approved a month before, we decided to head somewhere we can drive, offers a varied experience and ideally cost less than SGD500 to fly. Perth came up as the top choice within mere seconds on Scoot (SGD420 per person for return ticket).

Perth is one of the largest metropolitan in Australia stretching from Two Rocks in the north to Rockingham (near Mandurah) in the south – 7 times larger than Singapore. Imagine the urban planning involved to provide public transport and utilities to such a large city. Our 6 days itinerary focuses road trips north and south of Perth. 

Day 1 – Perth International Airport – Hertz Car Rental -Fremantle for the night (Cool Studio via Airbnb)

Day 2 – Lancelin: Sand Dunes & Sand Surfing – Nambung National Park: Pinnacles & Desert drive – Fremantle for the night (Cool Studio via Airbnb)

Day 3 – Head South to Busselton Jetty – Lunch at The Goose – Eagle Bay Brewing Co. – Cape Naturaliste – Sugarloaf Rock – Coles @ Margaret River – Margaret River for the night (No.12 Garden Studio Apartment via Airbnb)

Day 4 – Margaret River Food & Wine Day: Margaret River Dairy Company – The Margaret River Chocolate Company – Providore – Hay Shed Hill (Best lunch!) – Vasse Virgin (Soup Factory) – Ashbrook Estate – Vasse Felix – Teddis Big Spoon (Korean Dinner) – Margaret River for the night (No.12 Garden Studio Apartment via Airbnb)

Day 5 – Head back to Perth – Bunbury Farmers Market – Mandurah – Flipflopfisheries (Shark Fish & Chips) – San Churro Mandurah – The Old Crow (Dinner in Perth) – Perth City Night View from Sir James Mitchell Park – Subiaco for the night via Airbnb

Day 6 – Outdoor activities on Good Friday: Brunch at Harvest Espresso – Fremantle streets and market – Fremantle Prison – Drive along the coast – Cottesloe Beach – London Court Cafe – Perth International Airport

Personal Tips I’d like to share

This slideshow requires JavaScript.

How to find good food on the go

It used to be called Urbanspoon when I was still in Sydney, now it’s Zomato. With the same interface, user experience and strong community – it is still my go-to app to find out what’s trending, what the locals like and what is around the area when I just want to fill my stomach.

driving

Driving in WA

We are less of a city-traveller, which is why we chose self driving as one of the best way to experience this land. Renting a vehicle was probably the easiest to begin with as there are tons of car rental companies at Perth International Airport. Andrew did most of the homework but what I gathered was:

  • Rental – If you and your partner can prove that you live together (same residential address), you don’t need to pay additional fees for authorizing a second driver
  • Car Insurance – There’s usually quite a high excess payable for any accidents or damages to the car. Read carefully the details to your vehicle insurance prior to renting. We decided to purchase travel insurance that covers excess to vehicle rental up to SGD500. You can do some travel insurance comparison on GoBear like I did to familiarize yourself with the different travel insurance out there.
  • Parking is generally more expensive in the city. We tend to look for street side parking but do take note of the different pricing indicated on the signs. There’s 1/2P, 2P, 3P etc, which refers to number of hours you can park within a specific timeframe usually indicated below that – along with whether it’s free or payable. Unlike Singapore, free parking is only allowed for the stipulated time frame on the sign. If you’re a homework person, there’s more information here.
  • Petrol surprisingly didn’t cost us too much despite us driving 1372km in a little Ford Hunchback. Each pump cost about 30 odd Aussie dollars for us. The petrol prices varies depending on location and provider/operator of each petrol station so if you’re looking for the cheapest petrol around you or in a particular area you’re heading to, use WA Fuel Finder

My new found quirk of the trip – Splitwise

It’s free, user-friendly, intuitive and so simple! Genuine review of this new app Andrew discovered for bill splitting – Splitwise. However, we used it more for tracking of expenses into 2 buckets – Airfare + Accommodation which is more of your pre-trip expenses, and cash expenses during the trip. We didn’t have to worry about scrimping and saving or overspending as long as we know we are on track and it is so much easier to decided who to pay what. Since he paid for pre-trip (SGD1.4k), I paid for everything during the trip (SGD1.2k) which end up somewhat balancing out the accounts 😉

Phew…took me a few hours on and off for this. Hopefully this overview itinerary will give you some ideas to toy with! I will be providing more of my thoughts and details for each sightseeing spot or restaurant and maps in subsequent posts.

If you have any cool finds from your trips or any comments, please let me know!


WFF#1: Ju Shin Jung, Brawn & Brains, East Coast Park Cycling

Yes, I just came up with a new abbreviation WFF – which stands for Weekend Food & Fun! I’ve always been a central dweller who seldom venture to the east nor the west, mainly due to the fact that I can’t drive (yet). So last weekend, we decided to head off for a mini adventure to the east.

Credits to Andrew Chua

1st Stop – Ju Shin Jung 

This outlet at Guillemard Road is very much similar to the one at West Coast, and great for family – ball pit for kids, Korean bing su dessert shop right next to it for after meals 🙂 JSJ is slightly pricey compared to Seoul Yummy or other Korean restaurants but its very much worth it for the wide spread of good quality, authentic Kimchi and Side Dishes, attentive service and spacious restaurant. Opted for BBQ Pork Jowl, Herb Marinated Pork Belly and Seafood Tofu Soup. The Pork Jowl was a little tough so if you want a tender smokey BBQ Pork, go for Pork Belly. Its somewhat sinful but you’re already there! Cheat meal.

Ju Shin Jung

One thing to take note of is the external metal casing supporting the BBQ pit underneath the table. PLEASE do not sit too close to it… #Truestory. I had a pretty bad burn from it.

2nd Stop – Brawn & Brains 

Flat White at Brawns & Brains

Hidden Cafe right around the corner of JSJ to satisfy my craving for a good cup of coffee! A little more of my comments of this cafe here.

A ride from ECP to MBS and back 

View this post on Instagram

Let's gooooo 🚴🏻 #cycling #Ecp #octopus #gopro

A post shared by Joan Cheong (@joancheong) on

Perfect exercise for those bums and thighs accompanied by gorgeous view from sunset to starry sky. We got tips from the east dwellers to rent our bikes from 12Cycle located at Marine Parade Central, right before you take the underpass to head to ECP. You pay a fraction lesser for better bikes! I think it was $8 for 3 hours for liking their Facebook Page. Just enough time for us to head from midway ECP to Marina Barrage, Gardens by the Bay, Marina Bay Sands and back to ECP, with a couple of good stops for photographs, a great way to relieve your daily work stress and enjoy a quieter, more peaceful side of this urban jungle we are living in.

Quaint hidden cafe – Brawn & Brains

We were on our way to Ju Shin Jung at Guillemard Village (Mountbatten MRT) after a Carousell purchase when this black banner “Brawn & Brains Cafe” caught our eyes just when I mentioned that I need coffee after food. Perfecto!

Flat White at Brawns & Brains

Mmm… how should I describe the location of this cafe hidden away from the hustle and bustle. Okay, turn right at the corner right before you see Ju Shin Jung and you will spot tiny yellow metal squares for the petite asses (which I do not have). You will notice many rock climbers hopping over from the rock climbing gym nearby.

Its a tiny, unassuming cafe with a relatively more casual crowd compared to pretentious coffee places. Over at Brawn & Brains, you get quality coffee at incredible prices! $3.50 for a decent flat white comparable to some in Sydney and $3.80 for an ice cold brew. You get to choose from the beans they offer that day, for instance ours was either Single Origin or (let me find out from my partner in crime). My flat white was a rich, very slightly acidic and smokey. Wallet friendly price is an absolutely bonus!

Didn’t take much photos so I shall keep it short. Drop by and try it for yourself 🙂 I noticed others happily munching on delicious looking Beef Pastrami Sandwich and Salted Caramel Tart, will probably try it next time!

Brawn & Brains at 100 Guillemard Road #01-07, get there before they close at 7.30pmhttp://www.brawnandbrains.sg

Hong Kong Mysteries – Kennedy Town

ElginStreet

There’s always something new to discover in Hong Kong despite my millionth time there. In the past, my friends and I adore the bustling local scenes on Kowloon side. But this time, I went in search of quirky westernised scenes nestled in old Hong Kong.

Kennedy Town, Hong Kong – Hippy Spin to an old town

This little suburb is a perfect place to head to for a sip of java and enjoy a meal away from the hustle and bustle of the city (which is really only 2 MTR stations away with the new extension of the Island Line).

A bit of HK History download from my local friend, Hong Kong Island was the beginning of this city, before expansion to Kowloon. Kennedy Town was a part of the reclamation along the coast and development was not as vigorous as other urban parts of Hong Kong until recent years, which explains how Kennedy Town is a melting pot of old and new.

IMG_2550Take a stroll along the strips of waterfront in the evening and enjoy the breeze, take in a slower pace and serenity of Hong Kong. It’s such an undiscovered gem for a romantic evening even my local friends were pleasantly surprised *took mental notes for spots to bring their girlfriends*.

IMG_2557

Go in search of cafes hidden away quietly among local cha chaan tengs and traditional medicinal shops. Every corner you turn, you will be able to find a delightfully designed cafe, Italian restaurant or pub to chill out. Walked pass Bistro Du Vin at Davis Street, didn’t get the chance to give this popular one a try. If you are in Hong Kong definitely give this a go! The restaurant offers a really relaxing French bistro vibe (somewhat countryside).

IMG_2559

Waffling Beans shopfront caught our attention and we were not disappointed by the Belgium Waffles and Coffee served. Tucked away on a street of car mechanics and hardware suppliers, this cafe hits all the sweet spots. The play of mirrors in the cafe, stocked with a bounty of magazines, free coffee smells and an extensive menu of toppings for your Belgium waffles.

Check out Kennedy Town the next time you’re visiting Hong Kong. I like to search for local favourites on OpenRice HK too whenever I am there.

Struggles of the new age

Do you feel like you want to do something but you just can’t seem to figure out what you want to do? I have that feeling all the time…my hands itch at the thought of being stagnant, and I get this feeling hitting me straight in my face whenever things get too boring, aimless or comfortable.

Maybe its a disease of the new generation.

Either way, I am obviously in that state now else I wouldn’t be sharing it.It doesn’t mean my life or work isn’t exciting, but I want a more holistic experience. And I notice that are a few small little baby steps to make myself feel “better” (or rather, less frustrated at my inability to stay still).

Just do something!

We wake up, go to work, come home, go to sleep. Repeat. It is easy to lose sight of the bigger picture and get into a robotic mode. I try to have something exciting to look forward to every week (as much as I can) – be it meeting friends, trying a new drink at the bar, catching a movie, or better still, if I get to learn something new like fishing or archery – it goes a long way. Its a fine balance between being in the comfort zone and being out of it. In it, you get bored, outside of it, you get stressed and uncomfortable but discover something new about yourself.

Find out the source of any bugging feeling and face it 

For instance, we have been brought up to find a job we like, only then will you find happiness. But does it mean that you quit if you hate it? Probably not. Sometimes all you need to do is identify the reason, and a simple change of setting some boundaries between work and personal life will help. Have goals for yourself outside of work! For me, my goal this year is get my diving and driving license.

I am still trying to figure out new ways to deal with this strange bugging feeling, and at the same time looking for opportunities to venture into new terrains.